If ever you have the misfortune of stripping an exhaust manifold stud, you'll want to read this. This "mod" of sorts will increase the overall pull strength of the exhaust manifold fasteners to the head and provide a much stronger and worry-free seal.
Background
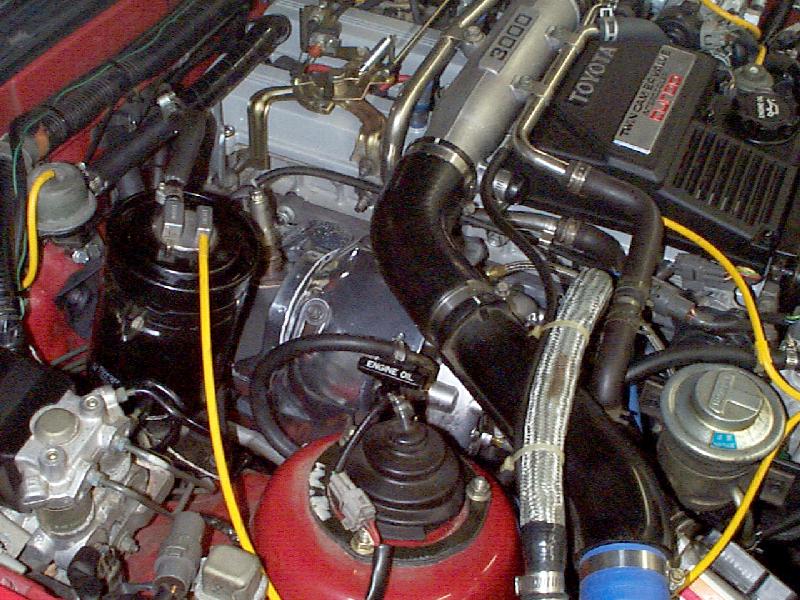
The exhaust manifold is held to the head via seven 10mm x 1.25 pitch (thds/inch) steel studs. The weakest link here is that the head is made of aluminum, a metal with very good heat transfer and strength to weight properties, but relatively weak for locally high stressors. When a stud is overtorqued beyond the relatively weak limits of the aluminum threads, those threads will give long before those on the studs do. Thus, instead of having to simply replace a stud, you end up having to somehow fix the threads in the head. Also, aluminum is an extremely reactive metal galvanically and will oxidize when in contact with most metals. So this only complicates the problem even more.
Well, one day, I noticed an unfamiliar noise emanating from around the turbo area. It sort of sounded like the exhaust rumble was coming from that area. Since my garage is notorious for having really odd resonance zones where the exhaust noise will bounce around, I thought it was in my head, but I logged it in back there and kept listening for it. It seemed to be louder in the mornings than when I got home from work at night which made it all the more difficult to diagnose. I did a cursory inspection of the area a few times but couldn't find any leaks. None of my gauges reported any problems, so I basically ignored it for a little while.
I mentioned the problem to my mechanic but he initially couldn't find anything either, until we did an oil change... That day, when we restarted the motor after refilling with fresh Redline, he was able to pinpoint the source of the noise at the back of the exhaust manifold near the firewall. He tightened up the rearmost bolt and the sound magically got lower and lower and finally disappeared. I was happy. Then, we decided to just check the torques on the other bolts around it and we found out the disappointing news... the upper bolt just forward of that rear one had stripped in the head! (read: sh*t!)
Actually, after thinking about it, I felt better having found the source of the mystery noise, but I was a little perturbed that I had to tear down the turbo and manifold to fix it. But oh well... it gave me yet another excuse to improve on an already amazingly engineered car again :-).
My mechanic simply recommended drilling, tapping and Helicoiling the threads, but I wanted to research all of my options before jumping into anything. The manifold wasn't leaking or anything, so I wasn't being rushed into any decisions. I began my research by talking to a bunch of machine shops and they all recommended to Helicoil all the threads since it would strengthen the fastenening surface. These guys did it on all the cars they built up... even those with cast-iron heads, since the steel Helicoils are still much stronger. I then called up Emhart Fastening Teknologies, who makes the official Helicoil products and talked with their engineering staff. The concurred with the previous remarks and backed it up with some engineering data I requested (scan coming soon):

According to Emhart, for the 15mm depth insert (std. 7M size), a pullout strength of 13,000 - 15,000lb per screw could be realized.
I also did some digging and found out the on Boeing aircraft, practically any fasteners installed in relatively weak parent materials are specified to use a threaded insert, such as a Helicoil. For these same reasons, companies like General Motors, Ford, Chrysler, Boeing, Pratt & Whitney, McDonnell-Douglas, NASA, Harley-Davidson, Caterpillar Diesel, Cummins, General Electric, Rolls-Royce, BMW and Porche use Heli-Coil inserts as original equipment in critical threaded areas of parts made of lightweight materials. That was all I needed to make up my mind. I was definitely going to do them all when I got in there!
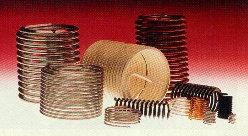
The benefits here are numerous. First, the fact that you are, in effect, screwing into a larger hole provides a much greater surface area and thus a greater fastening strength. Second, since the coil can float or move with the parent material, it actually provides a more uniform loading on the threads of the stud instead of the usual effect of the greatest loading being on the first few threads. And thirdly, the fact that coil is made of active stainless steel gives it greater strength and resistance to damage from screwing and unscrewing. Active stainless also is relatively immune to galvanic corrosion effects.
 So I began analyzing the various fasteners out there to see if I could do any better than Helicoil.
I looked at timeserts and others, but everyone recommended the use of the real McCoy. So, I
did some digging on my Helicoil options and found that I actually had two options here and
not just the one. Instead of getting the typical free-running Helicoil, which is the most
common and widely used, I could get their top-of-the-line Screw-Lock Helicoil, which provides
added vibration resistance via a specially deformed center thread. A resilient locking device
grips bolts and prevents loosening from vibration or impact; making lock wiring, nuts, and
washers, chemical compounds, plastic pellets or patches and other locking mechanisms unnecessary.
So I began analyzing the various fasteners out there to see if I could do any better than Helicoil.
I looked at timeserts and others, but everyone recommended the use of the real McCoy. So, I
did some digging on my Helicoil options and found that I actually had two options here and
not just the one. Instead of getting the typical free-running Helicoil, which is the most
common and widely used, I could get their top-of-the-line Screw-Lock Helicoil, which provides
added vibration resistance via a specially deformed center thread. A resilient locking device
grips bolts and prevents loosening from vibration or impact; making lock wiring, nuts, and
washers, chemical compounds, plastic pellets or patches and other locking mechanisms unnecessary.
A series of straight segments or "chords" on one or more of the insert coils grips the bolt as it enters the threads. This causes the segments to flex outward. This flexing creates pressure on the bolt and establishes an extensive contact area to provide a positive, consistent, prevailing torque over multiple cycles. The insert's surface finish and hardness reduce friction erosion to increase thread life.
Yet, it doesn't harm the thread in any way and the stud can be removed and reinstalled many times with no detrimental effects. Hell, it even conformed to a military standard for use on tanks and so forth (MIL-I-8846 & MIL-N-25027). I was hooked and it was decided. What I needed was the following part for a M10 x 1.25 pitch x 15.0 mm depth coil:
It proved rather difficult to get the screw locks since they're relatively unpopular for consumer use, but I managed to buy the last 13 which Emhart had in stock. Any more would have to be made with a minimum batch order. Therefore, I'll include the information for ordering standard free-running coils for anyone who needs them. The free-running coils have all the attributes stated above except for the deformed center thread. It's what most everyone uses and would be fine, I'm sure, for a good fix:
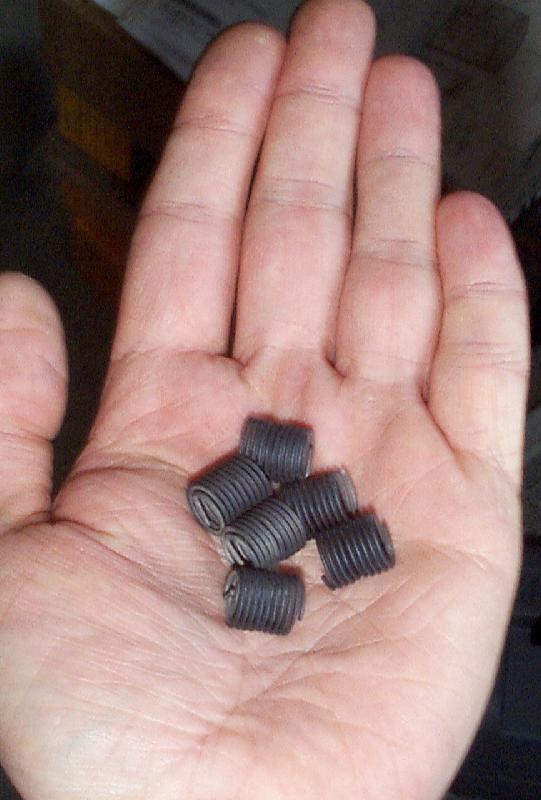 I also decided to get all these parts (the Helicoils and the exhaust manifold studs) coated with
dry-film lube molybdenum disulfide (MOS2) from my usual coating guys. This would let
me not have to use anti-seize lubricant in the installation to prevent corrosion-based seizing. This
would also ward off any other environmentally based corrosion effects. Emhart actually sells
these coils with the same coating on them for nearly $12 per coil. I decided that I could could
everything myself for that price and pay the normal $1.50 or so per coil. With the 6 extra coils
I have, I can also theoretically sell them for a profit. So anyway, if the fasteners look gray
to you, now you know why :-).
I also decided to get all these parts (the Helicoils and the exhaust manifold studs) coated with
dry-film lube molybdenum disulfide (MOS2) from my usual coating guys. This would let
me not have to use anti-seize lubricant in the installation to prevent corrosion-based seizing. This
would also ward off any other environmentally based corrosion effects. Emhart actually sells
these coils with the same coating on them for nearly $12 per coil. I decided that I could could
everything myself for that price and pay the normal $1.50 or so per coil. With the 6 extra coils
I have, I can also theoretically sell them for a profit. So anyway, if the fasteners look gray
to you, now you know why :-).
Installation
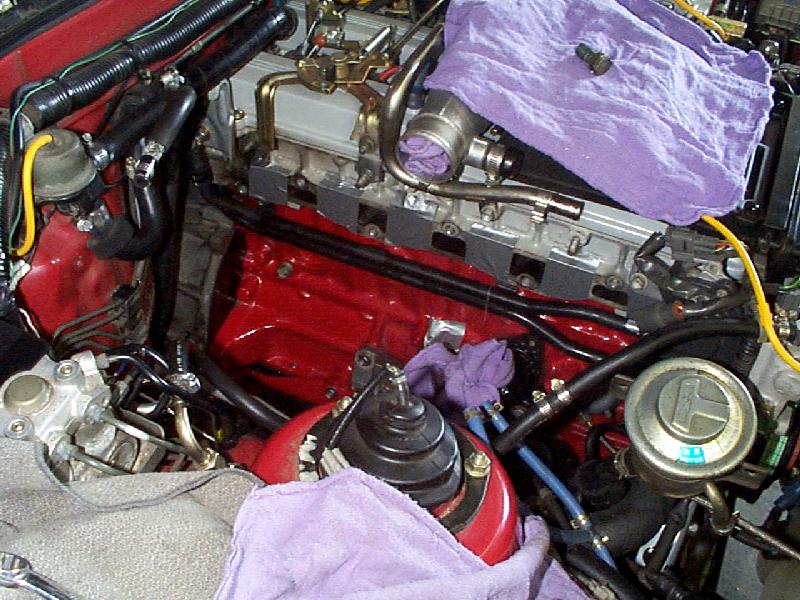
First, the coolant was drained and the all the miscellaneous turbo hardware was pulled off. You can see in this picture of my trunk of goodies all the things pulled off (save the manifold) as well as the items in preparation for a radiator refill. I have an adequate supply of distilled water to prevent any solid elements from getting into the system as well as another charge of Redline SuperCool WaterWetter.

Upon removing the exhaust manifold and gasket, it was immediately apparent that exhaust blow-by was occuring here on the rear three cylinders and a little on the fourth. You can see how important it is to have equal loading on any gasket surface. This is the result of one single bolt loosing torque:
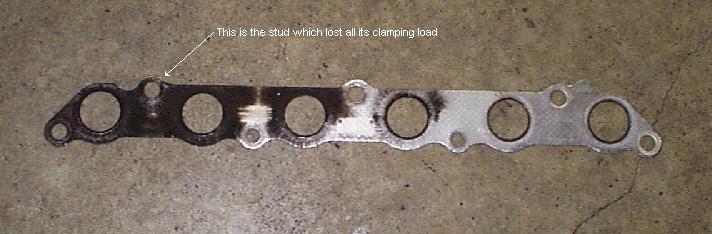
This can also cause a loss of exhaust velocity and an increase in turbo lag as well... so it was obviously something you couldn't just put out of your mind and hope it'll go away.
My mechanic measured the manifold for warpage and found it to be out by 4 thou, so we sent it to the machine shop for a quick shaving. This would also give a nice smooth surface which would provide maximum sealing. When we got it back, we took great care not to damage the ceramic coating while still deburring and smoothing the port entries a little:
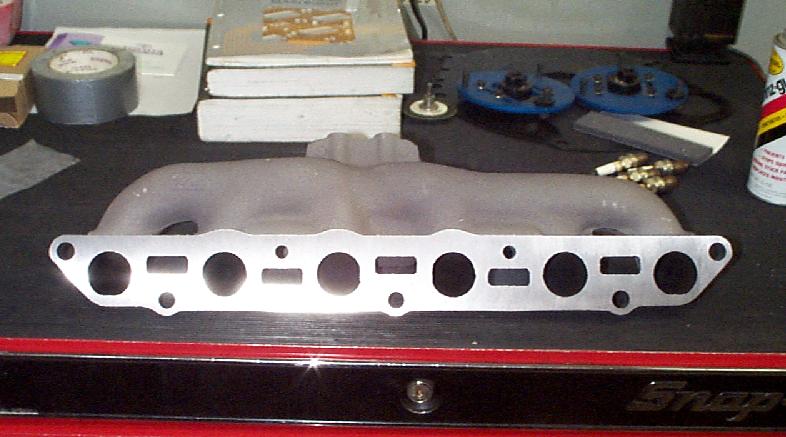 | 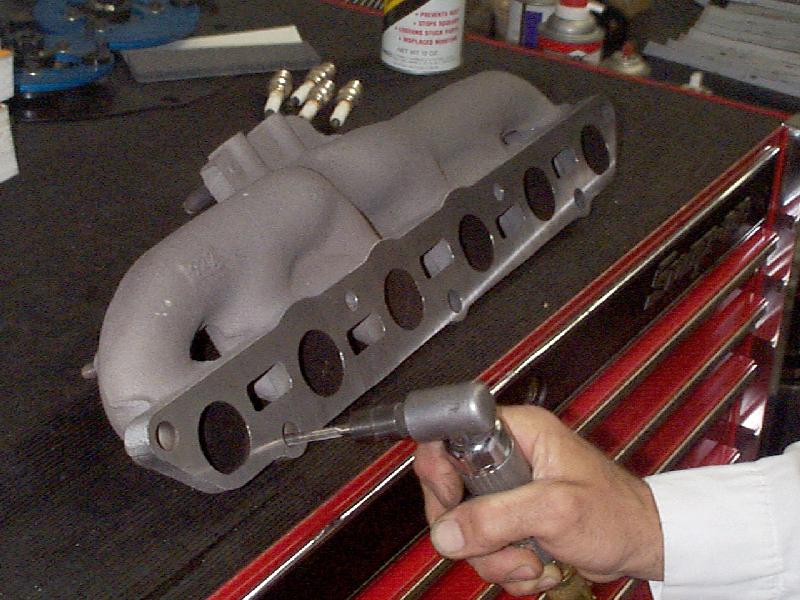 |
Exhaust Manifold After Shaving | Deburring Exhaust Manifold |
When installing a Helicoil, you must first drill a larger hole and then tap this hole. The coil is then inserted into it using a special tool. This tool grabs onto the tang on the end which allows the coil to be wound up. It can then be screwed into the tapped hole. Once the tang is released, the coil wants to unwind and thus exerts a uniform outward pressure on the hole. As easy as this might sound initially, I'd only recommend it to those extremely comfortable with doing this kind of work. Many things can go wrong here. You could drill to deeply and break into a water jacket, you could drill off center and cause unequal loading on the threads, or you might not tap a perfect thread for the coil to seat into. All I can say is be careful.
My mechanic used a new bit and tap and was extremely careful to align everything correctly. When tapping aluminum, you need to use lots of oil on the bit to prevent damaging the aluminum and you need to take your time. He taped off the exhaust ports to keep bits from getting in and the result was as follows:
 | 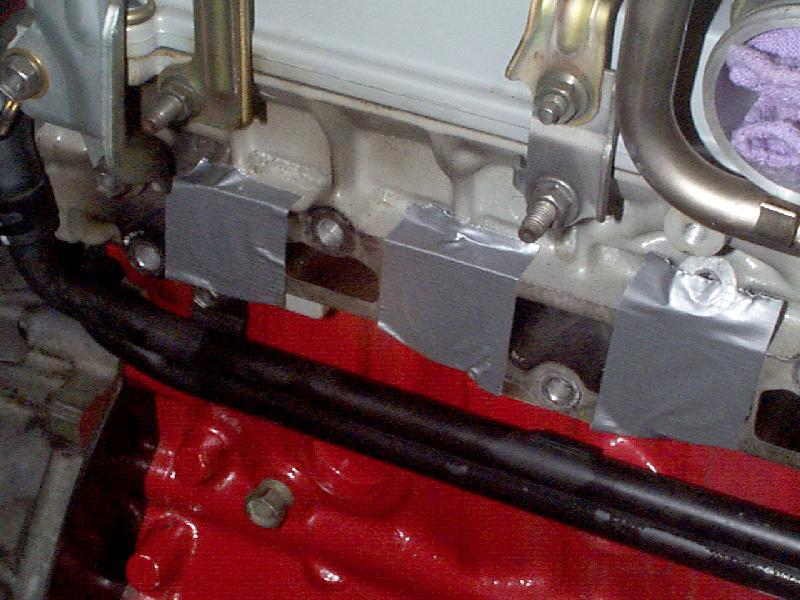 |
Helicoil Inserts In | Helicoil Inserts In (closeup) |
After removing the tangs using a small pair of needle nose pliars, the studs went in using simply a jam nut setup to bolt them in:
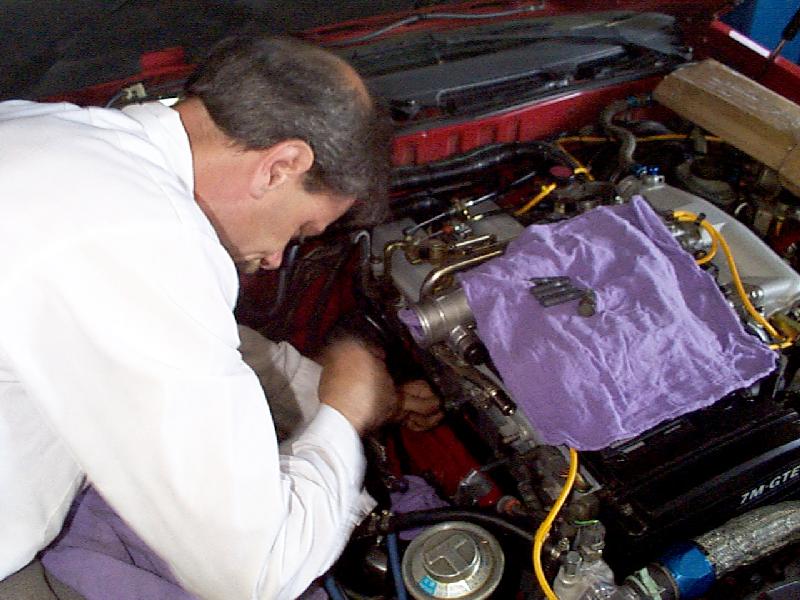 | 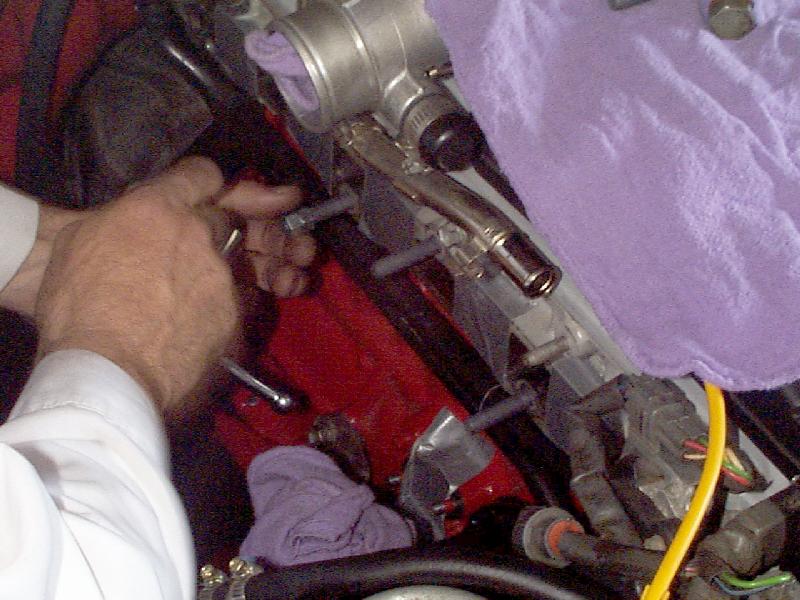 |
Pat Inserting the Manifold Studs | Inserting the Manifold Studs (closeup) |
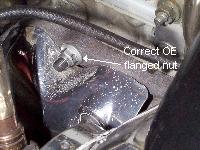
With the studs in, the manifold could be installed using a new gasket and a set of new exhaust manifold nuts. Note to make sure you use the correct OE nuts here since the OE ones have a nice wide flange on them to better disperse the loading. Others will work in a jam, and certain mechanics/dealerships will try and pawn them off on you if the OE ones aren't in stock, but the OE ones are best for this application.
With everything done, the turbo, the turbo oil feed and return, the turbo coolant feed and return and other numerous pipes were all reinstalled (with new gaskets if necessary) and everything was buttoned up. The result was a nice, tight, well sealed exhaust/turbo setup which should be worry-free for the life of the car.
 Head
back to my mods page...
Head
back to my mods page...